|
|
Post by VICIOUS on Feb 13, 2007 19:15:00 GMT -5
Welcome to my Pathing tutorial. To make it simple, i've gone ahead and chosen a screen cap. Ah, this one is energetic enough >:3 You'll see i've added a second layer, filled it with white, and decreased the opacity to 75%. This helps me see my paths better. Like Tracing paper. 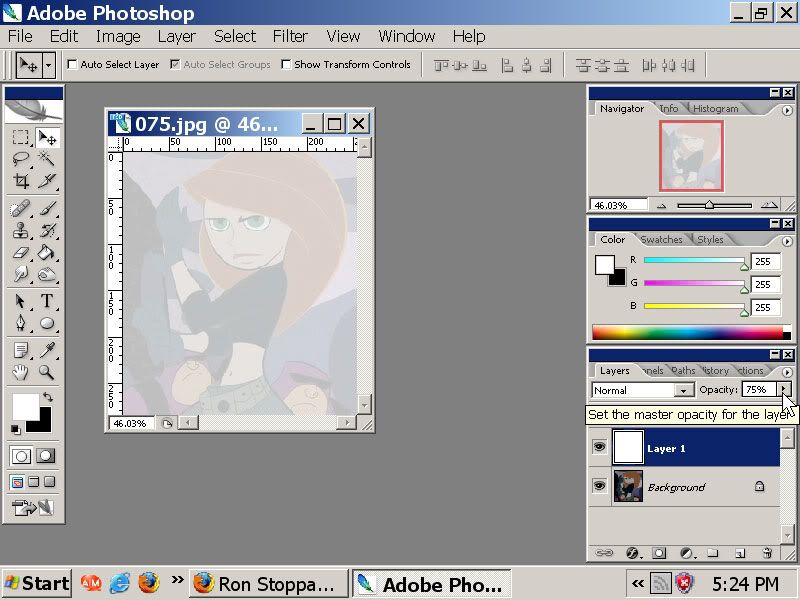 This will be separated by lessons, each lesson becoming progressively more complicated. Keep in mind the official way to use these things is in Illustrator, photo shop was just made to Edit them, but I've gone far with what I've got xD. Lesson 1: The Pen and its Path...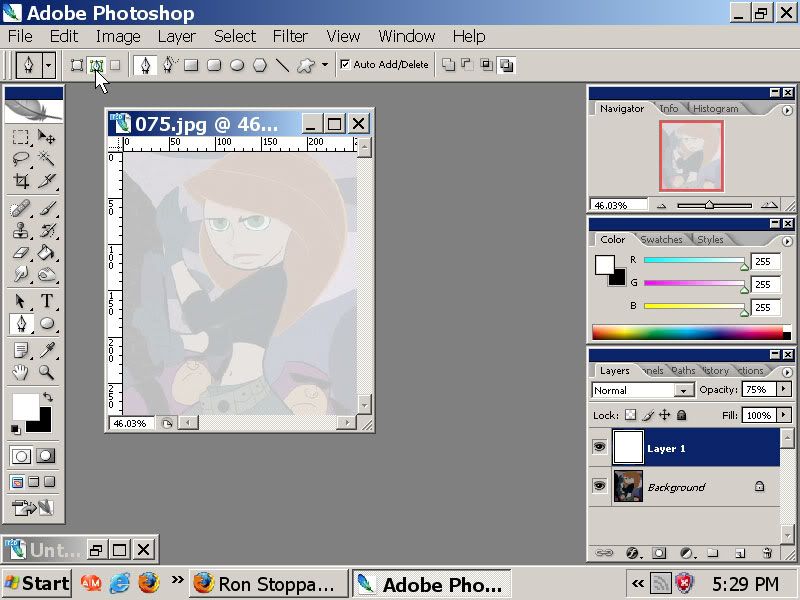 Select the "Pen"  tool, and make sure to select the "Paths"  button above, if you've never worked with the pen before, it should be set, by default, to "Shape Layers." 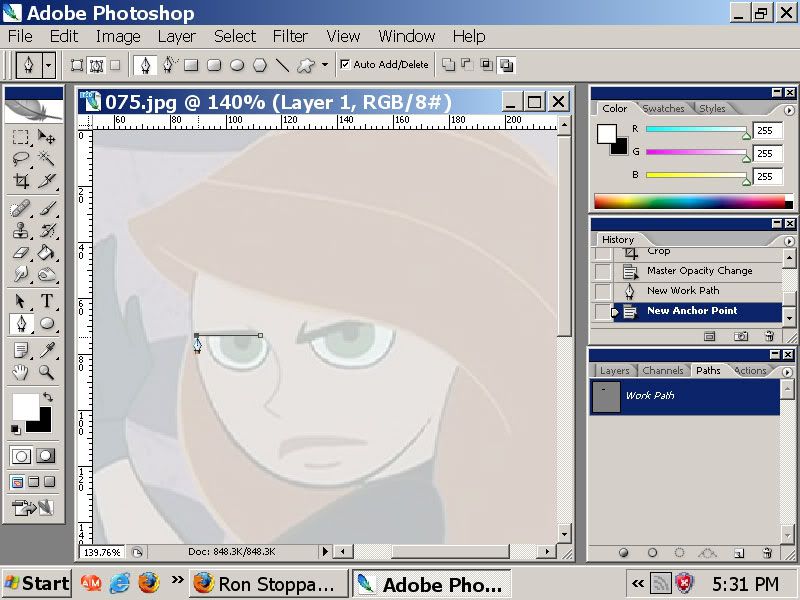 Best for Straight lines, such as Kim's eyebrows in this particular pic, simple Click a corner, and click another, then another. It simply paths a straight line. You'll also notice that no matter how big or small you zoom in or out, the Path remains one pixel thick. That is because these simply Aren't lines. They'll never show up in printed works, or when saved as Jpegs, there more like.. guides, but, they're paths! Don't worry about it  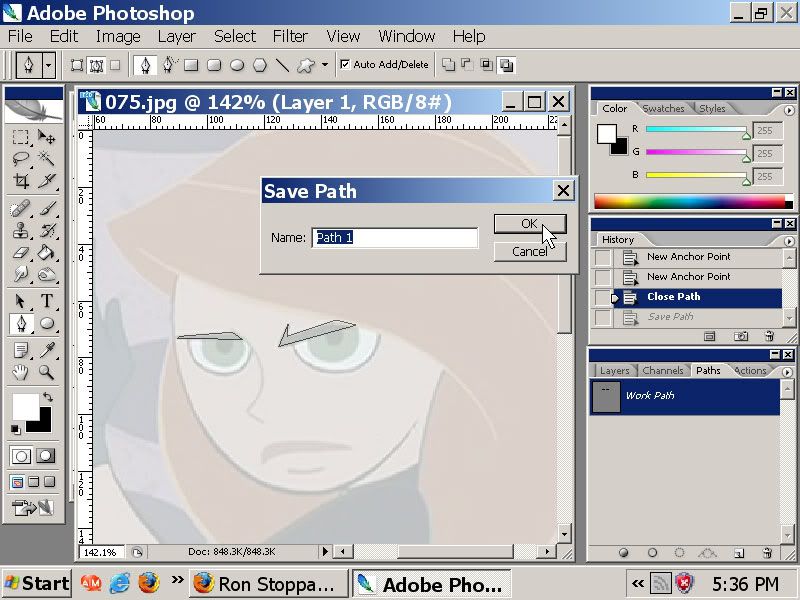 You'll notice that once you've connected the path, you've created what photo shop likes to call a "Shape". Shapes are very helpful, and can later be edited and reshaped with certain tools, but that's for an advanced lesson! For now, you've got a shape, so be happy! Select the "paths" tab in your "Layers" window, and make sure to save it. You'll find yourself NEVER having to Just make straight lines. That's where the pen tool works it's rendering muscle: 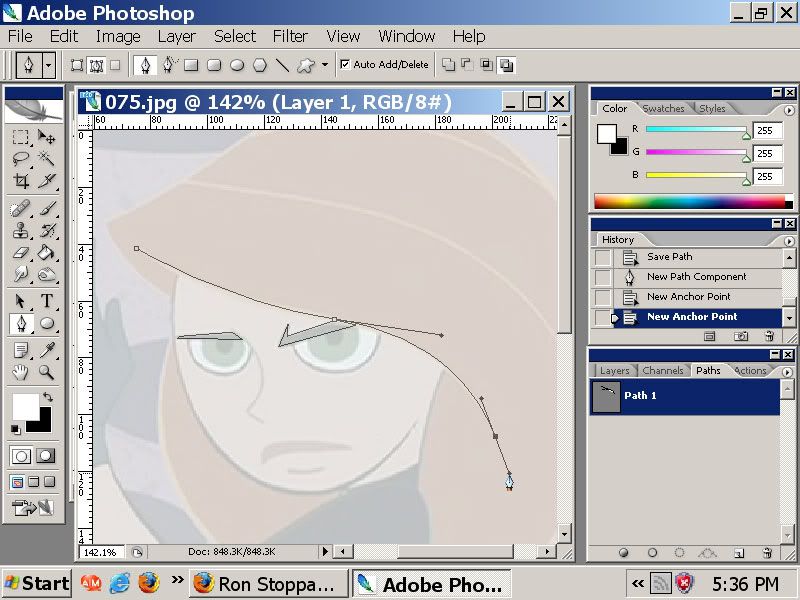 Click once, at the beginning of your line. If your into Racing, this should be easier than you think, if your not, better learn how to steer a car through a corner.. Place your second "anchor" (the little block that appears when you click) at the Apex of the curve, and drag, don't let go of your button. 2 handles will appear on either side of your anchor. These are called "points". Later you'll find these points just as editable so that you may change the degree of your curve. Again, click at your next apex, and drag, or click the end of your line and drag as well.. Thusly, Kim's bangs have been pathed. You'll notice that, when your not closing a shape, it attempts to continue on creating your path. Just hit 'enter', or select a blank area in your Paths window, and then reselect the path you had saved. If you don't reselect it, and decide to go on creating a new anchor, it'll create a new "Work Path" layer. Practice this a bit, it should take some getting used to, but if your pen tool Cant create a curve you've drawn, then something in your picture simply Shouldn't look right, or your not using the pen right. |
|
|
|
Post by VICIOUS on Feb 13, 2007 19:32:41 GMT -5
After fiddling around a lot. you'll easily find some lines you didn't expect to grab, visa-vi;  Notice the Massive point that's stretching out of the anchor? That was used to create a more natural curve down Kim's hair.. 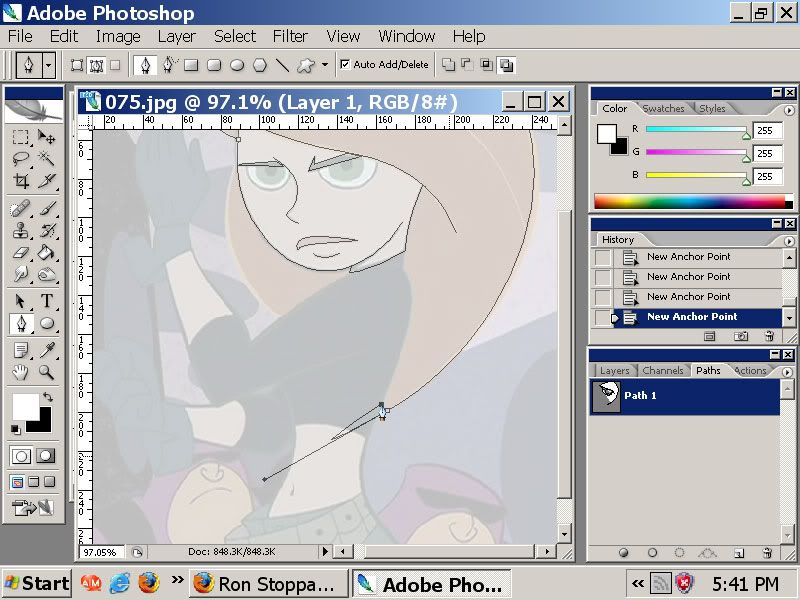 And this is what happens when you click your second point *sigh* No worries, though! Lesson 2: Convert thou anchors! 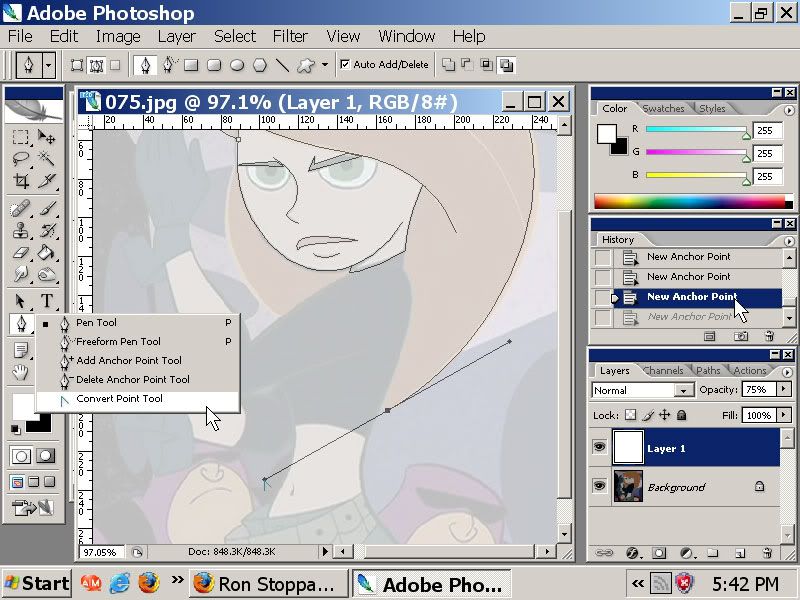 First off, bump yourself up one on the history, or ctrl-z if you wanna be cool. Secondly, right click on the button and select "Convert Tool" Your cursor thus changes into a nifty little.. pointer.. thingy. Finally, click and drag that lower Point towards the anchor, and get it as close as possible, i went ahead and zoomed in. 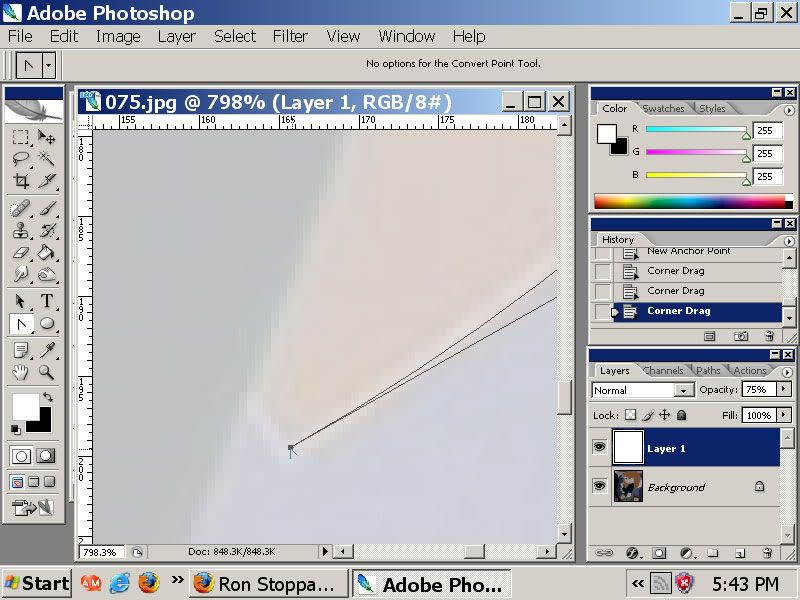 Thusly, theres no point to force the curve that was generated earlier, one more click and bam! 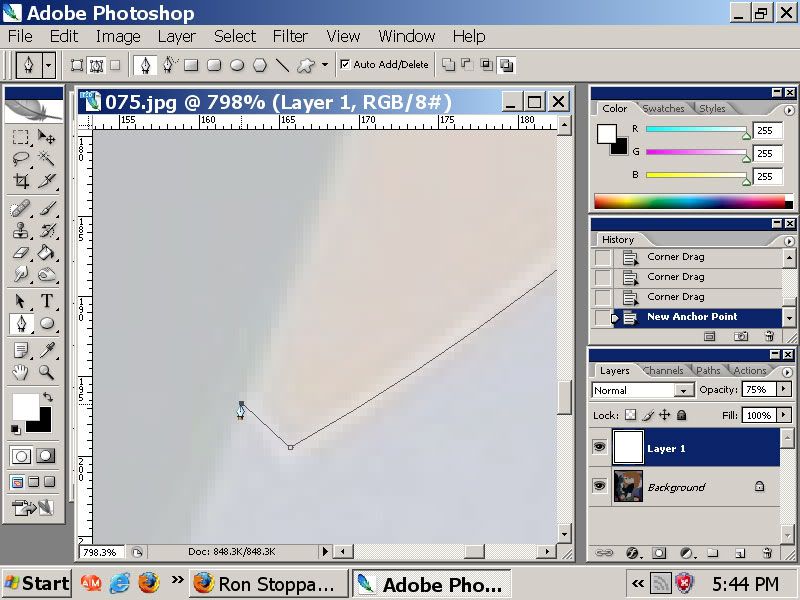 Easy as cake, piece of pie! This is probably the easiest of the pathing lessons. |
|
|
|
Post by VICIOUS on Feb 13, 2007 21:08:56 GMT -5
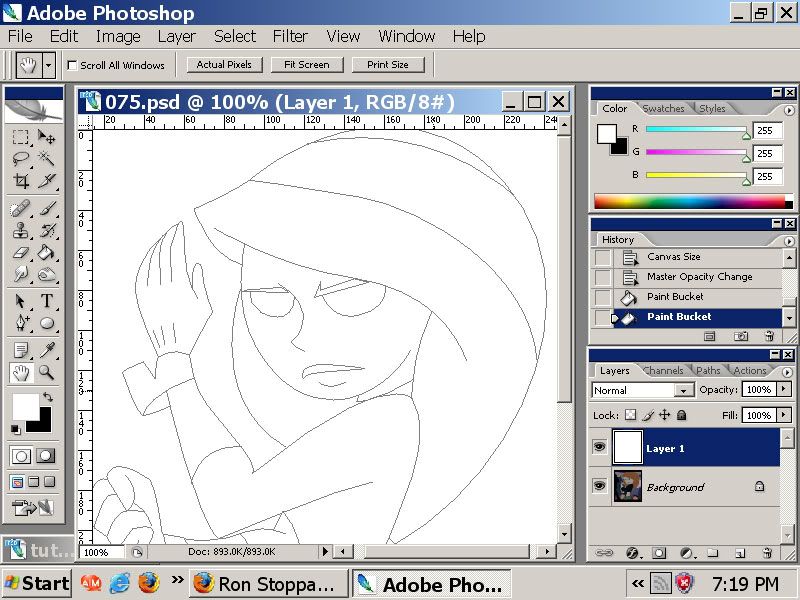 So now, after a bit more work, i'm left with this. Don't worry, i have yet to use anything more than the two techniques i told you about above. But now we get to the fun stuff.. Lesson 3: Editing Paths and Shapes!First i'll start you with shapes. Click on the "Elipse"  tool. Trace over Kimmie's eyes, don't worry if it's not perfect :3  To Achieve perfection, grab your "Path Select"  Tool, and select the Iris or pupil. Edit>Transform, or simply, Ctrl+T, will show the bounding box. You can use this to transform a path just as one would a picture. But for a more Pixel Perfect method, try this: 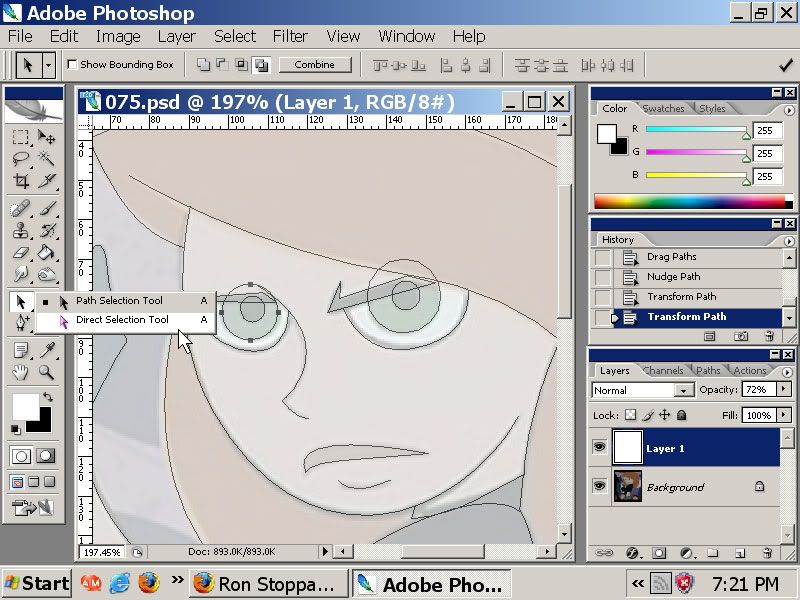 Right Click your button, and select the "Direct Path Select" tool. This will select curves or anchors Individually. You can then select an anchor, nudge it around, or select and drag a curve to skew it around. 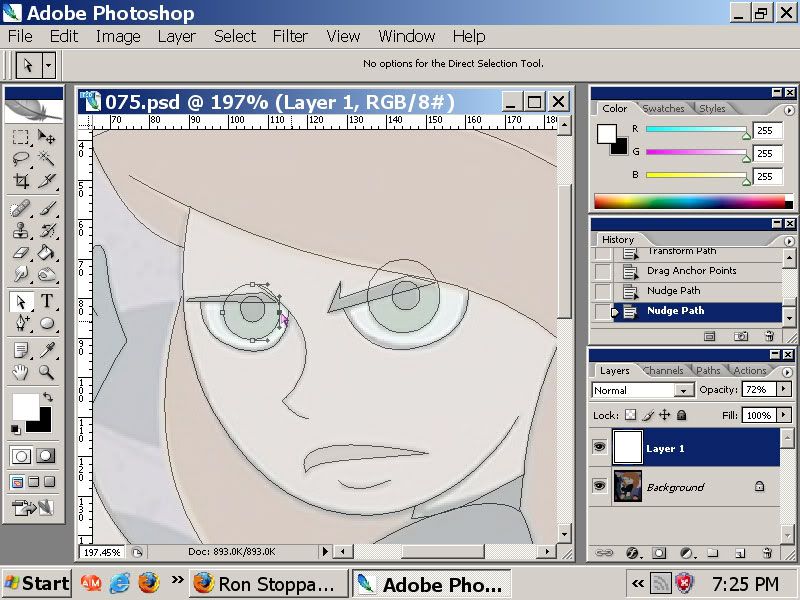 Next, you'll note that we don't want Full circles, we want haves, so were gonna have to chop these up. Their not pictures, so we can't just throw a bounding box over the top half and click delete, we have to do something a bit more advanced. With this Direct Select tool, we can select curves, as i mentioned above, but we can also Delete whatever path thats set between anchors, so we must set some anchors.  Right Click the pen tool, and select the "Add Point" tool.  Click just below where the iris and pupils' paths meet the eyebrow, and you'll notice the tool adding on more anchors. Now, go back to your "Direct Select" Tool.  Select the curve,  Press the delete key. 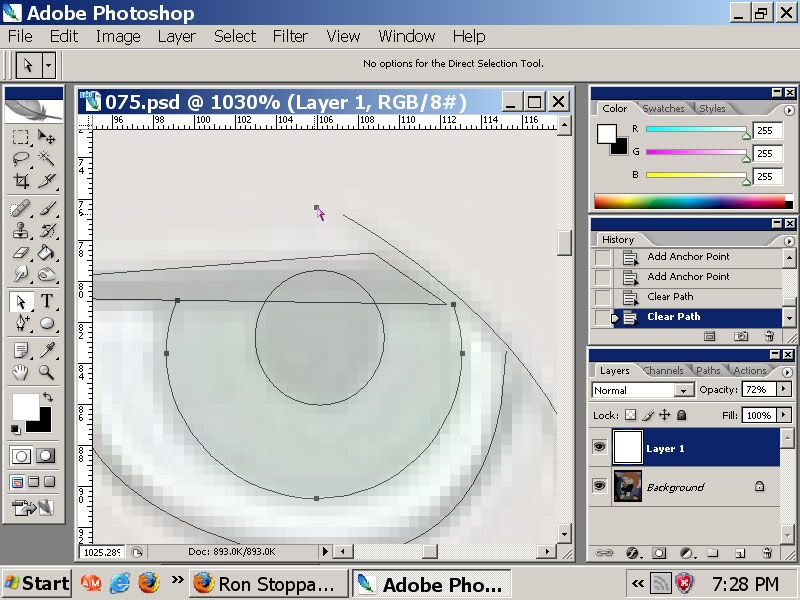 Do the same to the other side, and rid of the lonely anchor. Of course, theres an easier way! 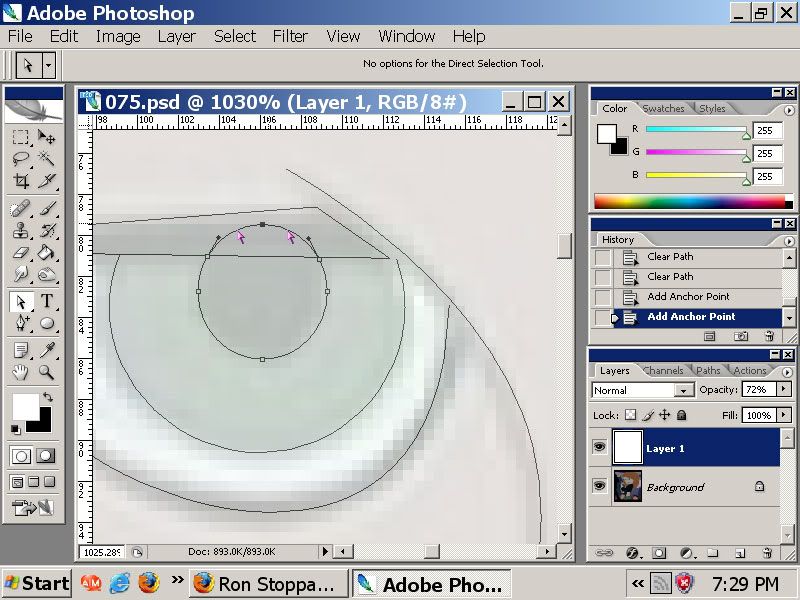 Select one side, hold 'Shift', select the other side, and delete! It'll automatically rid of the anchor for you. Repeat these steps on the other eye, and Anywhere else you'd ever decide to incorporate overlapping shapes. My Final Product: 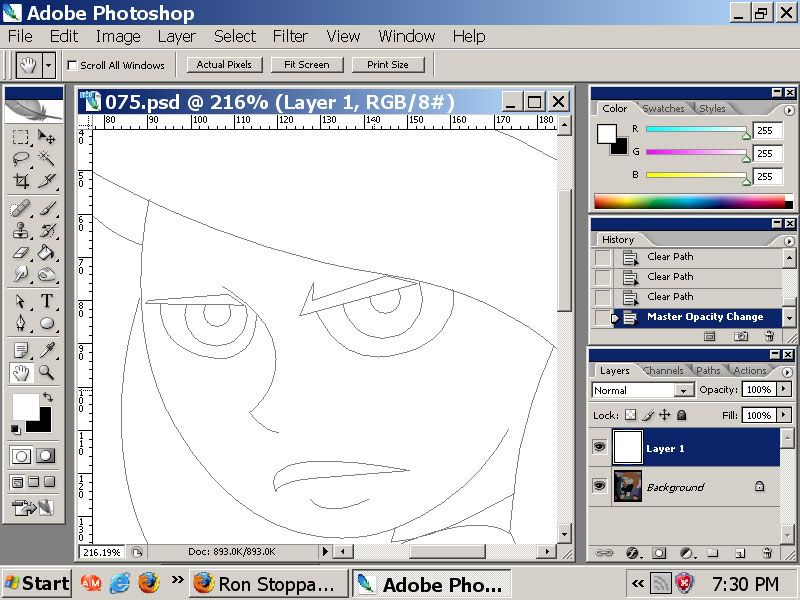 |
|
|
|
Post by VICIOUS on Feb 13, 2007 21:18:14 GMT -5
Lesson 4: Moving and editing individual anchorsNow, before we move onto the fun part of the tutorial, we have to make sure everything is perfect, or else your coloring could get thrown a bit off, unless you enjoy mousing around with a brush tool >.< 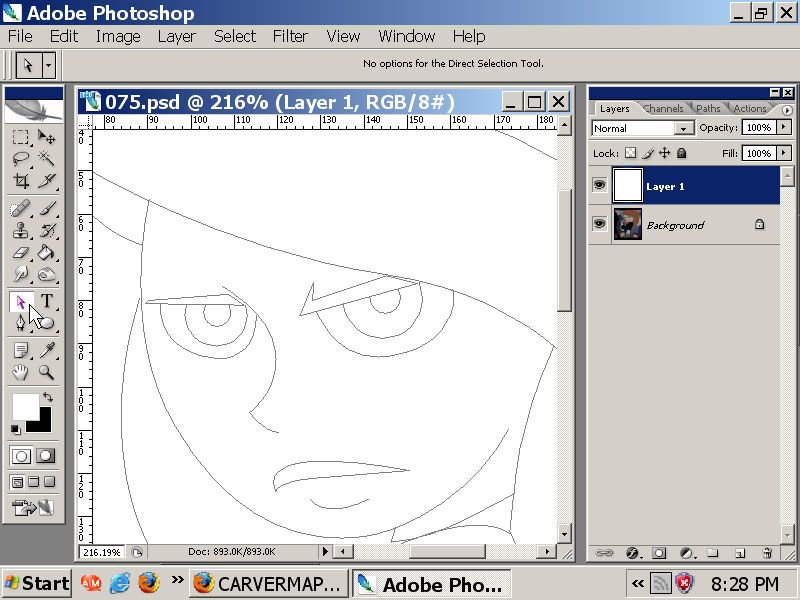 First things first, grab that "Direct Select" Tool once more.. Our objective here, Angels, is to make sure every line intersects and closes or touches every line we want it to! If not, the paint bucket will easily leak out colors all over the place. So grab an anchor...  Drag into desired location... 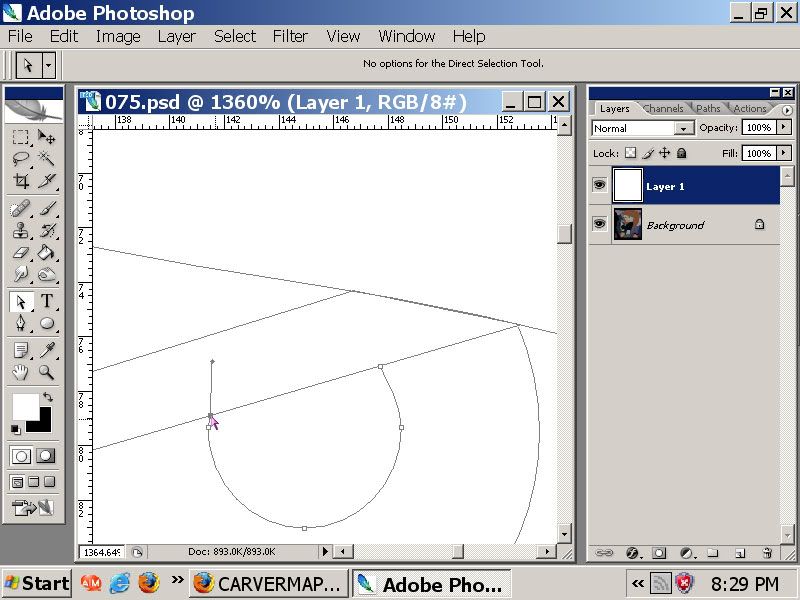 Grab another anchor, and so on. Check Every single vector of the piece, make sure everything is in place! This may seem like a lot of trouble, but it saves you from a lot more. o.o Finally, my Path's are complete, took me less than 20 minutes to grab and position all the anchors. 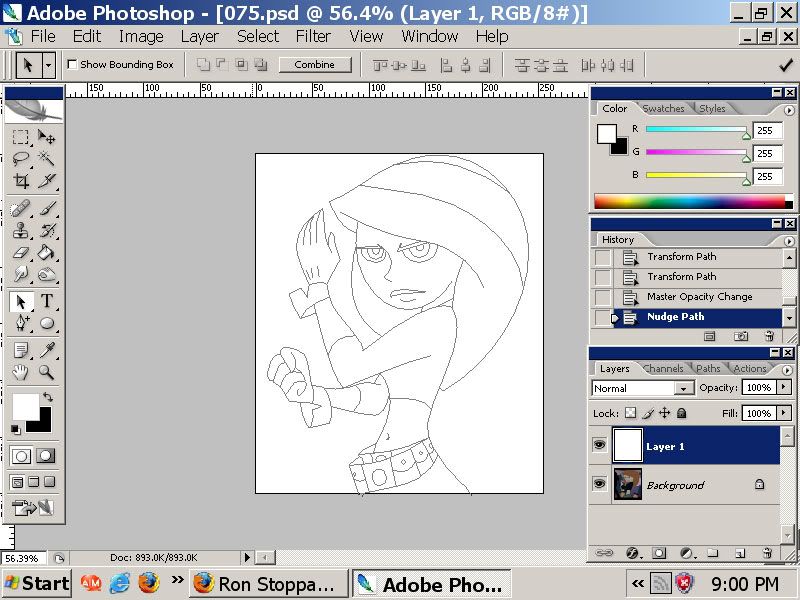 Finally, we can play with it!
|
|
|
|
Post by VICIOUS on Feb 13, 2007 21:18:31 GMT -5
Lesson 5: Turning paths into a Masterpiece. Now we get into the coloring! From here on out, I'm treating you like you know what your doing. If you can't handle the brush tool, you shouldn't even have read this tutorial yet, so mweh! Also, screen caps from here on out are in 1280 rez.. I just can't color in 800x600, it's torture! First off, we need to make our picture alot bigger, take advantage of our new paths. They conform whenever you resize your picture. So, as you should know... 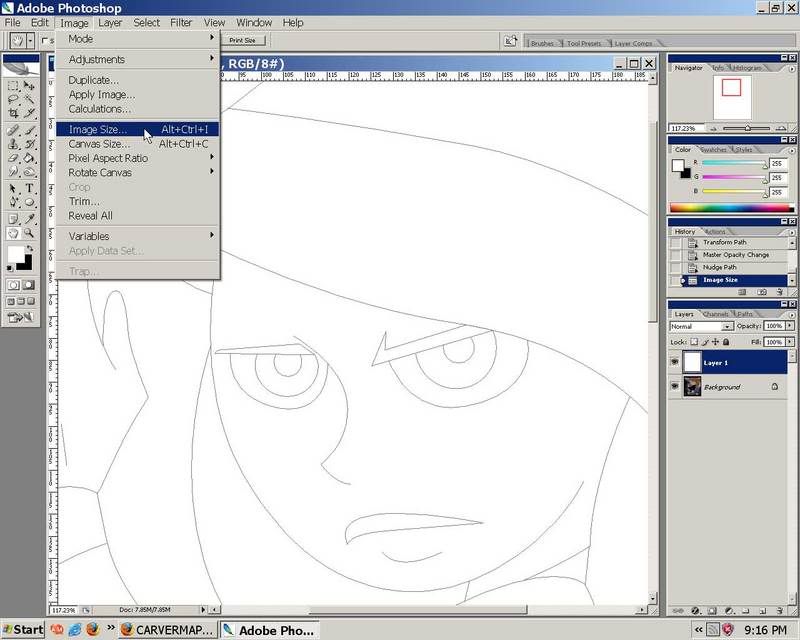 Select Image/ Image Size:  Try to double, or triple the Resolution.. Some idiot screen capped whatever i was tracing at 2 pixels per inch... How the hell is that even possible?! I set it up to six.. Still an awkward number, unless a pixel is actually rectangular! O.O! Now with your picture so much bigger, you get plenty of room to work with, and you get to resize if smaller, so no matter what, when your done, you know it'll come out Smooth. Create a new layer for your lines: 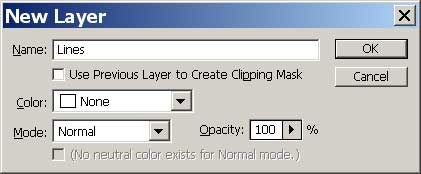 I call it.. Lines! My technique is simple, i choose a small brush so that i can get around to the coloring part: 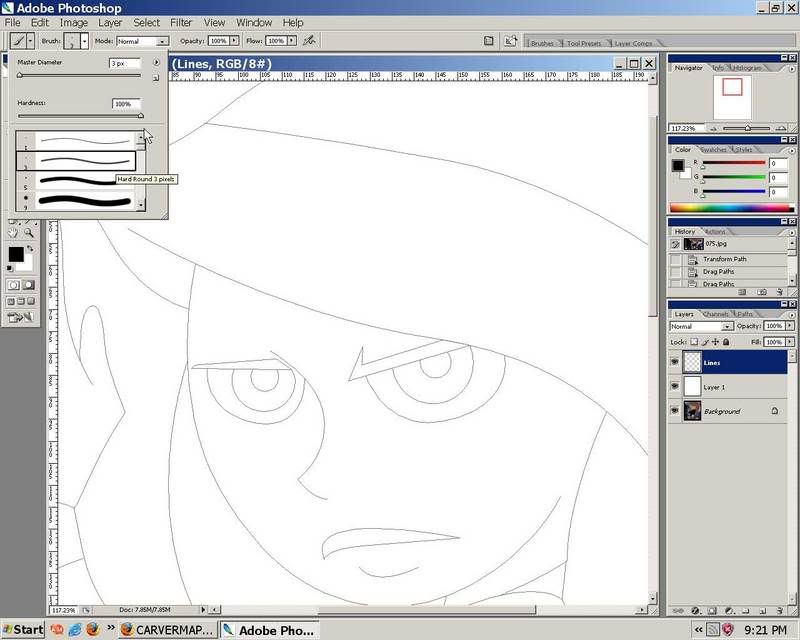 Then, you simply go back to the tool, right click anywhere as long as your saved path is still selected, and choose "Stroke Path"  Deselect your paths by pressing enter, and Check out those clean results! 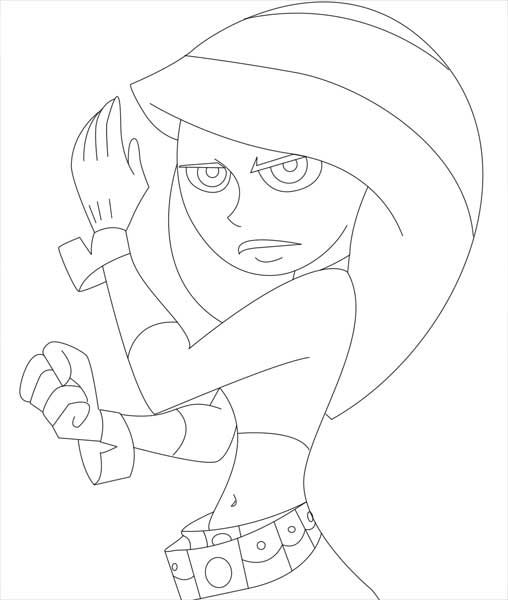 Create another layer, i called mine "Color!" because, you guessed it, we finally get to color the darn thing! Select your  tool, and then make sure to set your Tolerance to a full 100%. This makes it so that the bucket antialiases perfectly with your lines, Zero tolerance would make it behave like the Paint Bucket on MS Paint. *shivers* 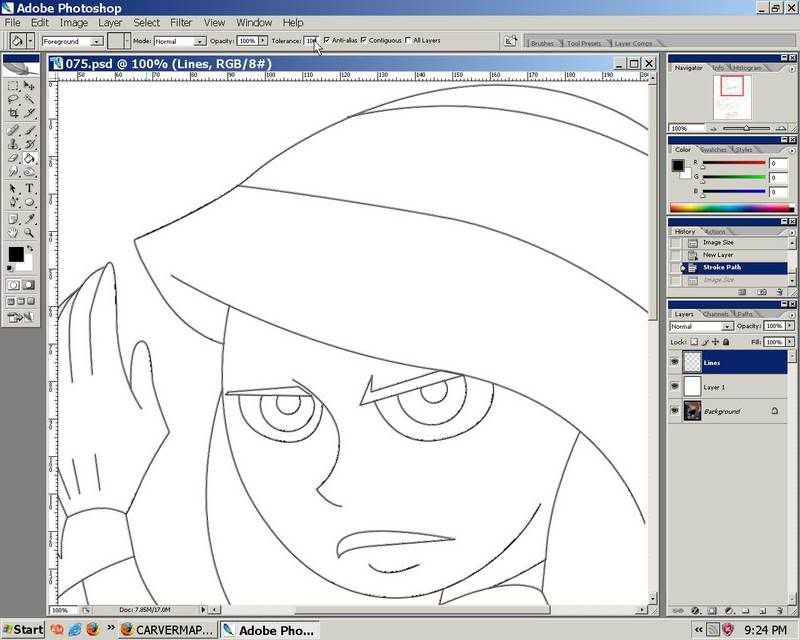 Now, watch as i suck out some color from that screen cap >.> 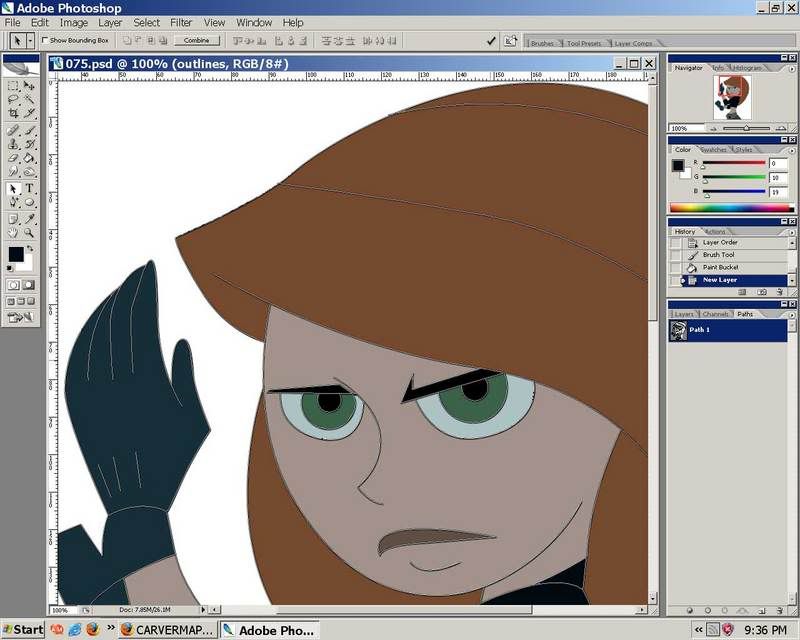 All in all it works rather well :3 I usually use different layers for different things, like the hair, face, eyes, clothes, and so on, but I'm being lazy here o.o! 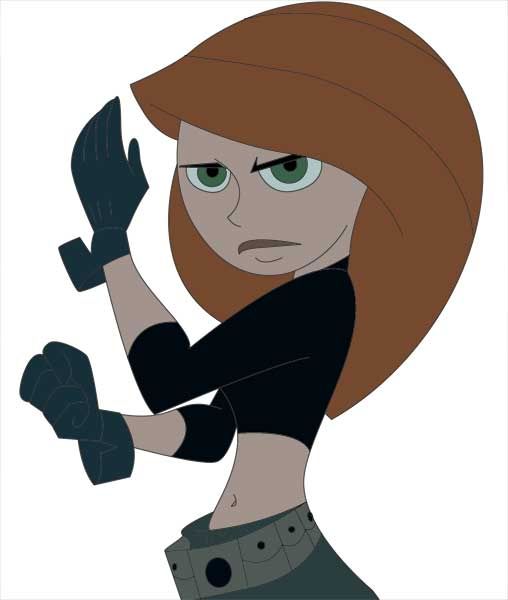 Heres were it gets a bit more challenging.. i guess.. *shrug* Create a new layer Over your lines layer, and your Color Layer. Reach for your tool once more, and select your saved path. Now, zoom out all the way, click and drag over EVERYTHING. Then Reselect the paths you DON'T WANT stroked. For me, this consisted of KP's hair, eyebrows, nose, lips, and eyes themselves, as well as her naval. 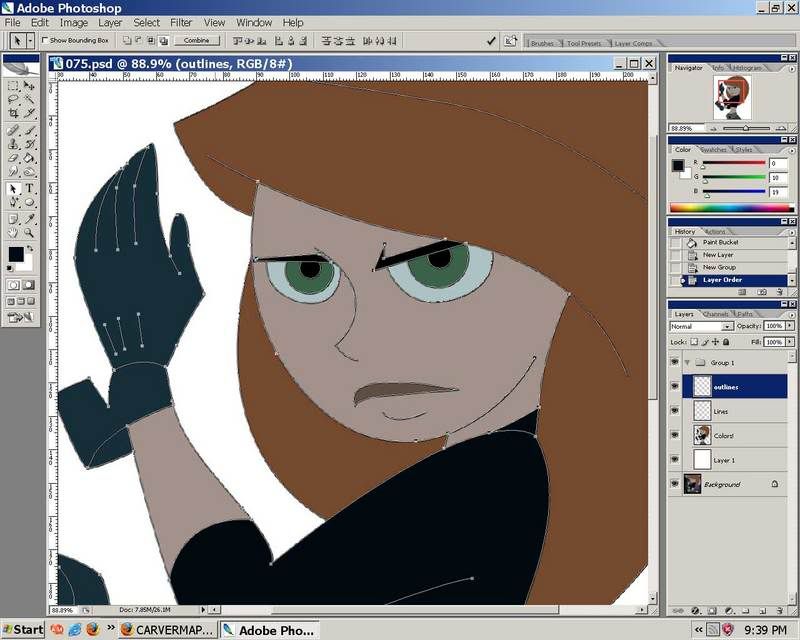 I then chose a much larger brush, this will be used for Stroking the path, but, with the 'Simulate Pressure' box checked. 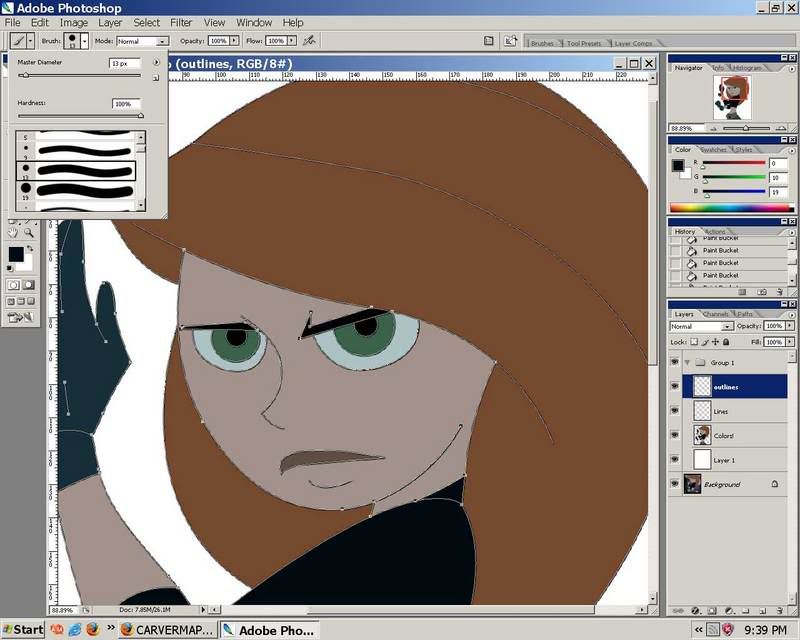 Now the lines get this romantic, thickened quality to them. You should now know how to select, stroke, fill, transform, and edit paths. Now, try to select the lines that don't show up so well, stroke them with different colors, have fun with the possibilities of photoshop! 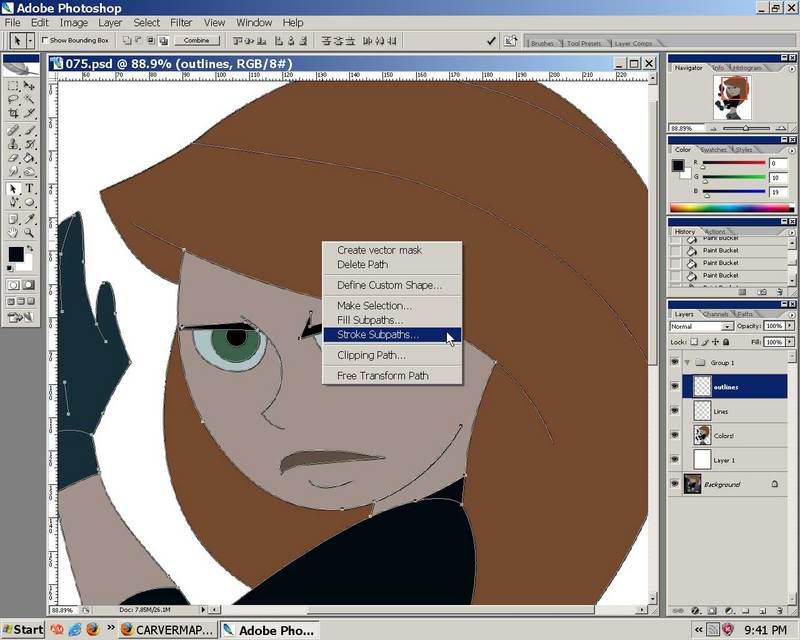 Finally, my finished product: 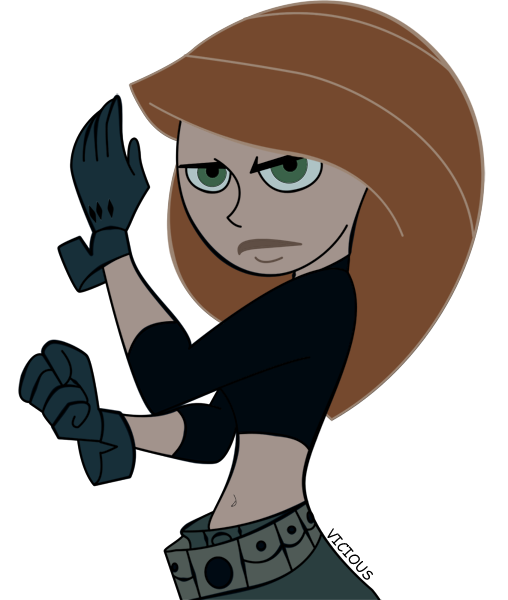
|
|
|
|
Post by VICIOUS on Feb 13, 2007 21:18:49 GMT -5
Start Posting! I'll finish up the tutorial later. *shrug*
|
|
|
|
Post by Snap on Feb 13, 2007 21:35:44 GMT -5
Oooh,paths. Niftay. I've never really used them myself, so this should prove interesting and informative...  |
|
|
|
Post by nabusan on Feb 13, 2007 21:43:11 GMT -5
God I love the pen tool! And I'm learning some interesting new tricks here. Thanks, VICIOUS!
|
|
|
|
Post by VICIOUS on Feb 13, 2007 21:51:22 GMT -5
i'm glad i could help share some of my intellect xD What little i have anyways >.>
|
|
|
|
Post by Slyrr on Feb 13, 2007 23:13:20 GMT -5
Nice tutorial. I don't use the pen tool nearly that much on characters though - I've got a little wacom tablet that I draw with. I mainly use the pen tool for more basic shapes and also when I need more graceful, flowing lines.
I often will only make a few paths at a time, get them to look the way that I want, and then stroke the path and delete it. This lets you have the line you wanted to draw, and keeps the drawing space clear of paths which otherwise might be too confusing to the eye. Once you've got the shape stroked, you don't really need the path anymore.
Some good practice also comes from designing 3D objects in a suite like 3Dmax or Maya. The bezier/handles on a control point are very similar to the 2D ones in photoshop and illustrator, only they also control shape on the Z axis. Learning to control those and to get a decent shape is excellent practice....
Slyrr
|
|
|
|
Post by VICIOUS on Feb 13, 2007 23:45:51 GMT -5
Yeah, but theres no need to delete the path when you can just deselect it. It's not like it gets in the way or anything *shrug* Besides, i use these alot on account i never had the opportunity to get a wacom *sniffle*
|
|
|
|
Post by Levelord on Feb 14, 2007 1:14:03 GMT -5
Ooooh I get it... It makes me feel stupid the way I color my pictures in. I don't save paths and stroke them as soon as I get one done. I don't even use the bucket to fill things up, I manually like paint everything in. lol But it makes me feel good about finished work |
|
|
|
Post by VICIOUS on Feb 14, 2007 1:20:44 GMT -5
xD Whatever works best, but doing everything in steps is usually faster :3
|
|
|
|
Post by Sarah on Feb 14, 2007 2:07:08 GMT -5
Guh! Yours looks excellent! Here's how mine turned out (also from a screencap):  Ack! Why is yours so good!? |
|
|
|
Post by VICIOUS on Feb 14, 2007 2:21:15 GMT -5
I dunno, but i'm loving your ron! That's just as awesome! perhaps it's cause the screencap i used was just more action oriented >.> *saves* You got the higher rez version?
|
|
|
|
Post by Sarah on Feb 14, 2007 2:23:54 GMT -5
|
|
|
|
Post by VICIOUS on Feb 14, 2007 2:30:41 GMT -5
Consider it Liked xD I've gotta do one of shego >.>
|
|
|
|
Post by nabusan on Feb 14, 2007 7:45:46 GMT -5
I love the finished tutorial! I've totally saved it  Thankies! And lol, ditto on Levelords comment. My technique is different, and I always end up fine-tuning it at the end by rubbing little bits off or painting little bits on. This way seems to get the job done with little to no fine-tuning! Bravo! I hope we have more tutorials from you! |
|
|
|
Post by VICIOUS on Feb 14, 2007 8:21:50 GMT -5
More tutorials? This is the only Note Worthy thing i know how to do with Photoshop xD
|
|
|
|
Post by drakkenfan on Feb 14, 2007 10:10:09 GMT -5
Is it possible to do this on Painter 8? I've always just scanned my pencil drawings and trace them by hand using a mouse in Painter 8, and my linework doesn't look this nice.
|
|


 Thankies! And lol, ditto on Levelords comment. My technique is different, and I always end up fine-tuning it at the end by rubbing little bits off or painting little bits on. This way seems to get the job done with little to no fine-tuning! Bravo! I hope we have more tutorials from you!